Publisher
mero
ProjectileOnCurve2D
Create 2d projectiles that move toward the target on a curve with gravity param to adjust the slope of the curve For more information navigate to: https://github.com/MeroVinggen/Godot-ProjectileOnCurve2DPlugin
This plugin has been mirrored from the Godot Asset Library.
The plugin author is in no way affiliated with Gadget.
If you are the author of this plugin and would like this mirror removed, please contact support@gadgetgodot.com.
Godot ProjectileOnCurve2D Plugin
About
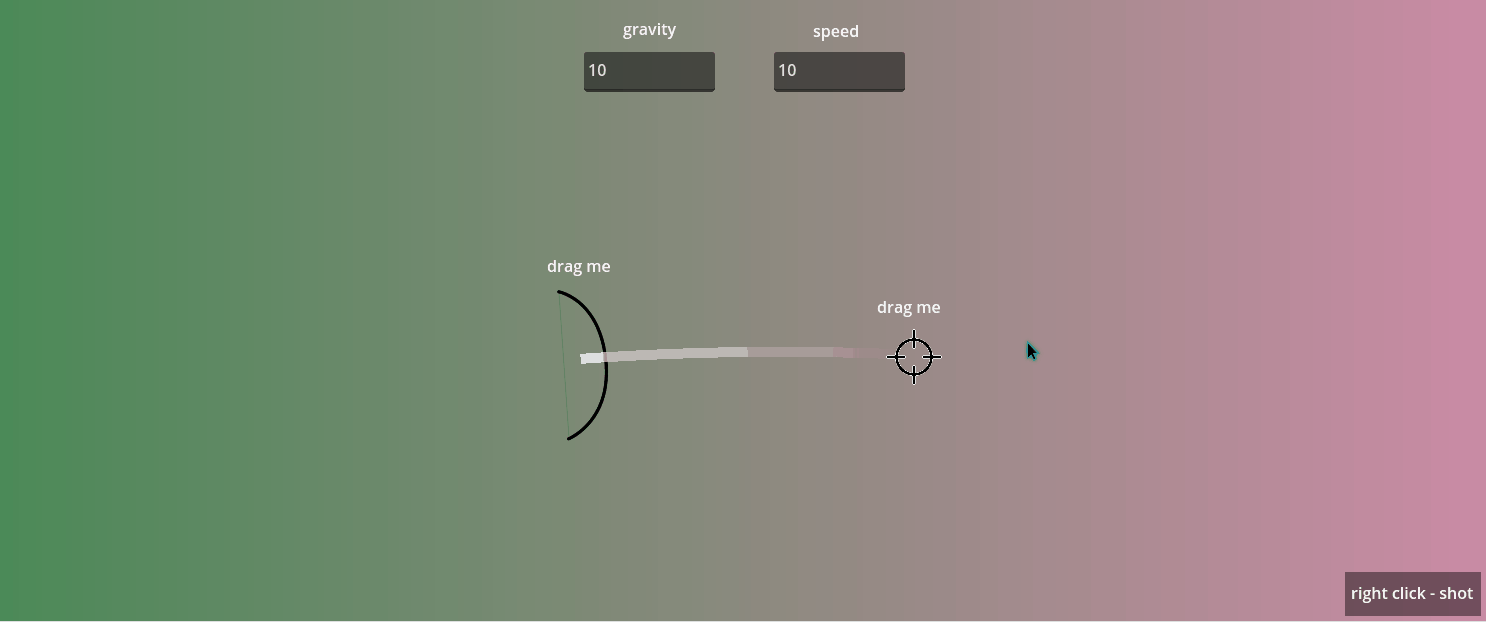
The plugin allows you to create 2d projectiles that moves toward the target on curve with arc height adjustment.
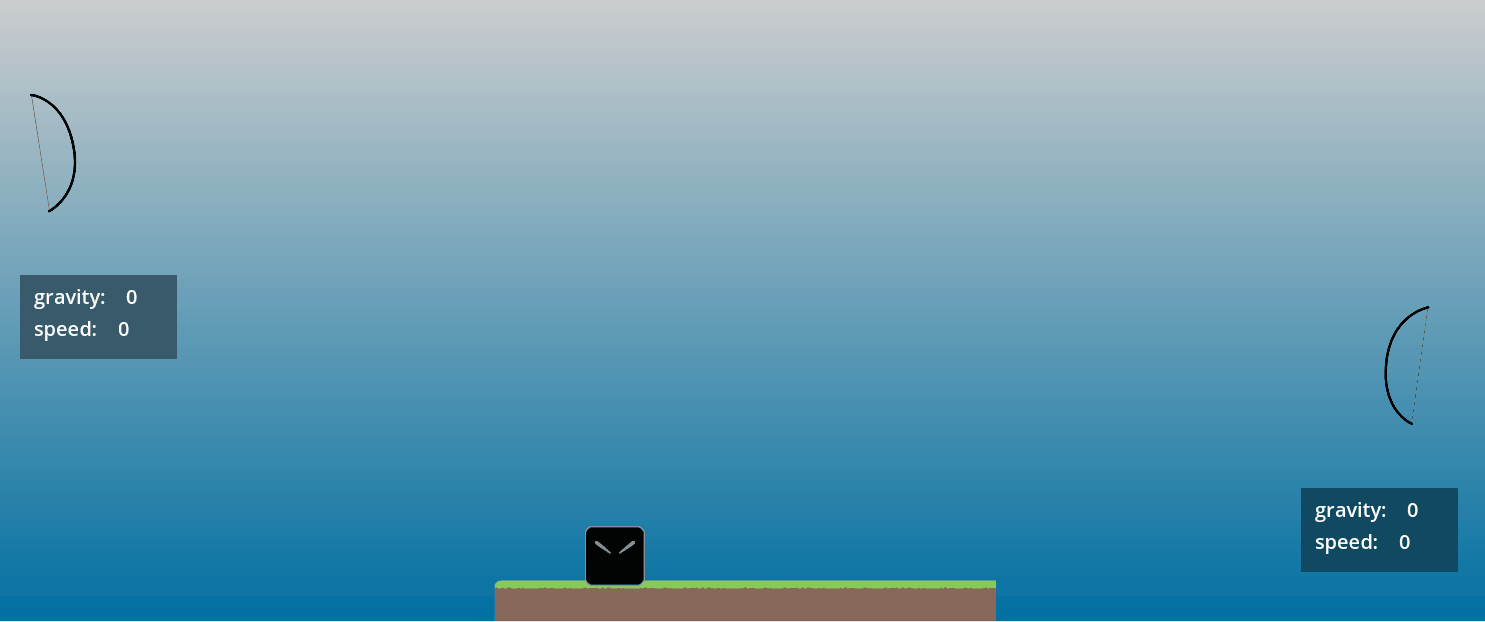
Demo Preview

Features
- Adjusting the angle of a curve by manipulating the projectile arc height
- Changing the projectile speed without affecting the trajectory
- Projectile auto rotation along the curve
Requirements
- Godot 4.0 or higher
[!IMPORTANT] This project uses Godot 4.4.1. You can edit it with Godot 4.2+, but the addon works from 4.0+
Installation
- Open the
AssetLibtab in Godot with your project open. - Search for "ProjectileOnCurve2D Plugin" and install the plugin by Mero.
- Once the download completes, deselect "demo" if you don't need the example scene.
- Open project settings -> plugins, and enable the plugin
ProjectileOnCurve2D. - Done!
Usage
[!TIP] You may find projectile scene example in the project at "res://demo/shared/projectile/"
- Create new projectile scene by inheriting the
ProjectileOnCurve2Dscene
[!TIP] You can use
ProjectileOnCurve2Das subnode for your projectiles, this is covered in Using as subnode
- Add nodes for visual representation and collision handing

- extend the root script to add the projectile logic
# connect `area_entered` signal of `Area2D` node to this func

func _on_area_entered(_area: Area2D) -> void:
  # destroy projectile on collision
  queue_free()
- Instantiate the projectile and call
launchto start the movement
# in your test scene

var projectile1: PackedScene = load()

func shot() -> void:
  var newProjectile: ProjectileOnCurve2D = projectile1.instantiate()
  newProjectile.launch(startPos, targetPos, arcHeight, speed)
  add_child.call_deferred(newProjectile)
Methods
launch(startPos, targetPos, arcHeight, speed)- projectile launchstartPos- start movement positiontargetPos- movement target position (projectile won't stop if reaches it)arcHeight- controls the height of the visual arc (higher values make the curve more pronounced; zero makes it a straight line, you can see it in demo preview)speed- projectile velocity (doesn't affect the trajectory)
stop()- pause motionmove()- resume motionstep(delta: float)- manual motion step call
[!IMPORTANT]
ProjectileOnCurve2Dis moving duringphysicsticks
[!WARNING] The
ProjectileOnCurve2Dchanges itsscale.ywhen the target is to its left
Using ProjectileOnCurve2D as subnode (less performant)
If you need your projectile root node to be of any other type (such as Area2D, Sprite2D etc.) your way is to add ProjectileOnCurve2D as subnode and extend it's script, where you need to synchronize the movement between ProjectileOnCurve2D node and your projectile scene, depending on your goals.
The ProjectileOnCurve2D is moving, rotating and scaling it self so to make it move your entire projectile scene or a certain nodes - you need to inherit and overload the _physics_process and use the ProjectileOnCurve2D transformations in your purposes:
_physics_process(delta):
  # the `ProjectileOnCurve2D` motion
  super._physics_process(delta)

  # sync transformations of your root node with the `ProjectileOnCurve2D`
  owner.position = position
  owner.rotation = rotation
  # caution! the `ProjectileOnCurve2D` changes its scale.y when target is from the right side
  owner.scale = scale
Sure thing you may sync only position and handle rotation/scale manually.
Demo
[!WARNING] Don't forget to check Requirements section
- Install the plugin and leave "demo" folder as selected
- Launch "res://demo/2 bows targeting mob on ground/2 bows targeting mob on ground.tscn" or "res://demo/BowWithAim/BowWithAim.tscn" scene
[!TIP] If you have already installed the plugin without the "demo" folder, just reinstall it or download the "demo" folder from the current repository and place it in your project, all the other steps remain the same