Tile to Gridmap
by MatthewKonobri
Tile to Gridmap for Godot 4.4
Easily draw 3D maps using Godot's 2D TileMap system.
This plugin allows you to place meshes and scenes on a GridMap based on tile placement, following simple terrain rules.
Designed for low-poly and pixel-art-style meshes but works with any mesh or scene.
Note: This tool does not generate meshes — it handles mesh and scene placement based on the TileMap setup.

Features
- Draw 3D maps using Godot's built-in TileMap editor.
- Dual-grid tile placement system inspired by jess::codes.
- Supports procedural terrain generation with chunk-based splitting.
- Prop placement system using the T2GProps node and resource.
- Compatible with any mesh or scene, not limited to pixel-art styles.
- Simple setup using Godot's existing TileSet and MeshLibrary systems.
Table of Contents
- Changelog
- Project Setup
- Using Tile to Gridmap in a Scene
- T2GTerrainLayer Node
- Tile to Gridmap Manager
- Tileset and Mesh Library Setup
- Drawing the Tilemap
- Procedural Generation System
- Prop Placement System (T2GProps)
- Credits
Changelog
1.1 Update
- Changed the way tiles are placed, no longer relying on Godot's built-in autotiling.
- Easier setup with fewer required tiles for a full terrain set.
- Added basic procedural generation features.
Introduction
This is my first Godot plugin, originally built to meet the needs of my personal 3D pixel art project.
I hope others find it useful for their own work.
Example art used in the demo scene (with permission) by Krishna Palacio:
Example meshes created using Crocotile3D:

Project Setup
Requirements
- Godot Engine 4.4
- Download from the AssetLib tab in Godot.
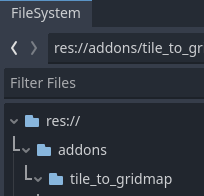
- The plugin installs into the
addonsfolder of your project.
Installation Steps
-
Download and Install via AssetLib
- Open your project in Godot 4.4.
- Navigate to the AssetLib tab.
- Search for Tile to Gridmap and download the plugin.
- Godot will place the files in your project’s
addonsdirectory.
-
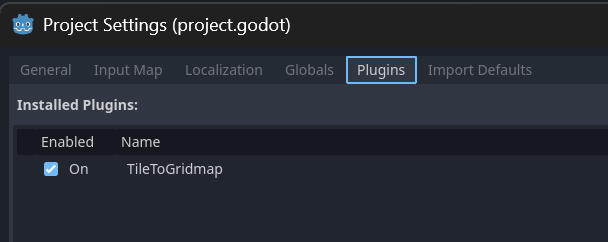
Enable the Plugin
- Open Project Settings → Plugins.
- Find Tile to Gridmap and enable it.
-
Verify Installation
- You should now see the Tile to Gridmap Manager Dock at the bottom-right of the editor.
✅ Tip:
The plugin works well with grouped terrain layers (T2GTerrainLayer nodes) and supports chunk-based procedural generation for large scenes. More details on setup are covered in the next sections.
Using Tile to Gridmap in a Scene
To use Tile to Gridmap, your scene needs at least two nodes:
Required Nodes
T2GTerrainLayernode- This is an extension of the
TileMapLayernode. - Requires an assigned TileSet resource.
- This is an extension of the
GridMapnode- Requires an assigned MeshLibrary.
✅ Note:
You can use multipleT2GTerrainLayerandGridMapnodes within the same scene.
Grouping them under separate parent nodes (by layer type or height) is recommended for organization.
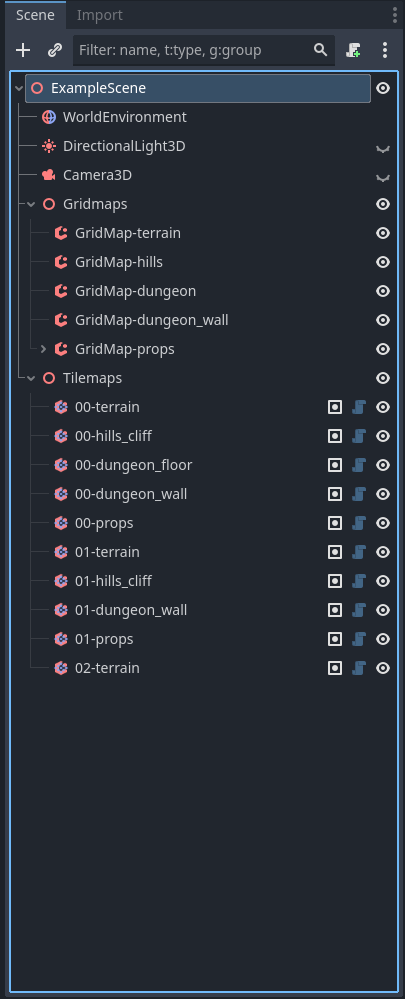
Example Scene Structure
Root Node
├── Terrain_Layers (Node2D)
│   ├── T2GTerrainLayer (TileSet: Terrain)
│   ├── T2GTerrainLayer (TileSet: Features)
│   └── T2GTerrainLayer (TileSet: Props)
├── Gridmaps (Node3D)
│   ├── GridMap (MeshLibrary: Terrain)
│   ├── GridMap (MeshLibrary: Features)
│   └── GridMap (MeshLibrary: Props)
🗂️ Tip:
I recommend separating nodes into different height layers or categories like Terrain, Features, Buildings, and Props. This helps keep your scene organized and easier to work with.
Example Scene Screenshot
T2GTerrainLayer Node
The T2GTerrainLayer node extends Godot’s TileMapLayer and provides additional functionality for mesh placement.
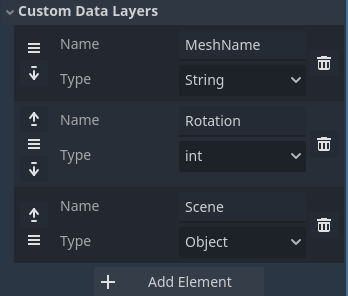
Required Custom Data Fields (in TileSet):
Name(String):
The base name for the terrain type meshes associated with each tile.Height(Int):
Used to prioritize terrain types when placed next to each other (higher values override lower ones).Exclude(String):
Allows skipping individual tiles when placing terrain (e.g., skipping the top-center tiles of cliffs).
T2GTerrainLayer Properties and Buttons:
- Is Manual Chunk:
Locks the chunk to prevent procedural generation from overwriting it. - Chunk Coords / Chunk Size / Tile Size:
Used to manage procedural chunk positioning (can be ignored if not using procedural generation). - GridMap:
Reference to the GridMap node where meshes are placed. - Grid Height:
Sets the grid height layer (default: 0). - Build Gridmap:
Places meshes/scenes on the GridMap based on the TileMap drawing. - Clear Gridmap:
Clears the associated meshes/scenes from the GridMap.
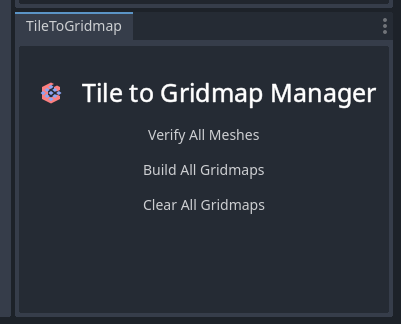
Tile to Gridmap Manager
The Tile to Gridmap Manager provides a dock panel with global actions for managing all T2GTerrainLayer nodes in the scene.
Manager Features
- Build All Gridmaps:
Automatically builds the gridmaps for allT2GTerrainLayernodes based on their TileMap data. - Clear All Gridmaps:
Clears the placed meshes/scenes from all associated GridMaps.
⚠️ Note:
The manager works by identifying nodes in thetiletogridgroupscene group.
EveryT2GTerrainLayernode is automatically added to this group when placed in the scene.
Tileset and Mesh Library Setup
Proper setup of your TileSet and MeshLibrary is required for the system to work correctly.
Tileset Setup
- Add a
T2GTerrainLayernode to your scene. - In the Inspector, create a new TileSet resource.
- Set the Tile Size to match your tilemap texture (e.g.,
8px x 8px).

- Add the required Custom Data Layers:
Name(string)Height(int)Exclude(string)

- Activate the tiles you want to use via the Tileset Tab:
- Only one tile is needed per terrain type with the dual-layer system.

- Set the required custom data values for each tile:
- Name: The base mesh name (e.g.,
grass). - Height: Priority for placement.
- Exclude: Comma-separated tile numbers to exclude if needed.
- Name: The base mesh name (e.g.,
Mesh Library Setup
- Open a New 3D Scene.
- Place all your terrain meshes as children of the root node (e.g., one
GLTFscene containing all meshes). - If needed, right-click the mesh nodes → Make Local to edit them (such as adding collision shapes).
- Export the scene as a Mesh Library via
Scene → Export As → Mesh Library.

- Back in your main scene, assign this Mesh Library to the GridMap node.
📝 Mesh Naming Convention (Required for Proper Placement):
Each terrain type requires 16 meshes named for their bitmask adjacency (e.g.,dirt0,dirt1,dirt2, ...dirt15).
For mesh variations, add a letter suffix (e.g.,dirt15a,dirt15b).
More details on bitmasking: Classification of Tilesets by Boris the Brave

Drawing the Tilemap
Once your TileSet and Mesh Library are set up, you can begin drawing on the 2D TileMap:
- Use your active tiles (with the proper
Name,Height, andExcludedata set). - Paint directly in the TileMap editor as you normally would.

-
After painting, click Build Gridmap on the
T2GTerrainLayernode to place the corresponding meshes/scenes in the 3D GridMap. -
View the result in the 3D viewport:

Procedural Generation System
The plugin includes two nodes for procedural terrain generation:
T2GProcGenManager: Controls world generation and handles chunk management.T2GProps: Manages prop placement (optional, covered in the next section).
T2GProcGenManager Features
- Clear Tilemap: Clears all content from the GridMap and associated
T2GTerrainLayers. - Generate World: Uses the provided noise texture to place tiles and meshes procedurally.
- Add Tilemap Layers: Automatically adds child
T2GTerrainLayerchunks based on the manager’s settings.
Procedural Settings
- Noise Height Texture:
Controls tile placement via grayscale values. You can use Godot’s built-in FastNoiseLite to create this texture. - Terrains:
An array ofT2GTerrainresources specifying which tile types should be placed at each noise range. - Transition Tile:
Coordinates of the tile used to blend between terrain types. - Width / Height:
Defines the total area of the world. - Tilemap Chunk Size:
Determines the chunk size of eachT2GTerrainLayernode. - Tile Size:
Pixel size of each tile. - GridMap / TileSet:
References to the GridMap node and TileSet resource used for generation.
⚠️ Crash Warning:
Godot’s editor can become unstable with more than 10,000 visible 2D tiles.
Using smaller chunks and hiding unused chunks helps prevent crashes. The 3D GridMap system remains stable even with large amounts of data.
T2GTerrain Resource (for Procedural Placement)
Each T2GTerrain resource includes:
- Name: Reference label (for your organization only).
- Noise Min / Noise Max: Defines the noise value range (0 to 1) where this terrain will be placed.
- Atlas Coor: Tile coordinates in the TileSet.
- Transition Tile Outer / Inner: Optional alternative tiles for transitions.
✅ Ensure your combined
Noise MinandNoise Maxvalues fully cover the range from 0 to 1. Gaps will cause errors and empty map sections.

Prop Placement System (T2GProps)
The T2GProps node extends the GridMap node and provides automated prop placement.
T2GProps Features
- Clear Props: Removes all child prop scenes.
- Place Props: Adds prop scenes onto the GridMap using the defined prop rules.
- Props: An array of
T2GPropresources specifying placement logic.
T2GProp Resource (Prop Rules)
- Name: A label for organizing your props (not used in code).
- Tiles:
List of tile names where the prop can be placed.
Example:"dirt"(matches all dirt tiles) or"dirt15"(specific to dirt tile 15). - Chance:
Placement chance per matching tile (0 to 1, where 1 is 100%). - Scene:
The scene file used for the prop being placed (can be any scene type).

Credits
- Plugin created by Matthew O'Brien (GitHub: MatthewKonobri).
- Example art used with permission from Krishna Palacio:
- Example meshes made using Crocotile3D:
Thank you for using Tile to Gridmap!
Download
Support
If you need help or have questions about this plugin, please contact the author.
Contact Author